Run ERPNext on Ubuntu for Accounting/Sales/Purchase/Inventory/Warehouse Management/Production/Projects/HRMS/Website and Much More.
What is ERPNext?
Free and Open Source Enterprise Resource Planning (ERP). ERPNext includes the following areas for managing businesses:
- Accounting
- Warehouse Management
- CRM
- Sales
- Purchase
- HRMS
- Project Management
- Support
- Asset Management
- Quality Management
- Manufacturing
- Website Management
- Customise ERPNext
ERPNext is built on the Frappe Framework, a full-stack web app framework built with Python & JavaScript.
Where is Repository?
Here is the link for Repository
GitHub – frappe/erpnext: Free and Open Source Enterprise Resource Planning (ERP)
Free and Open Source Enterprise Resource Planning (ERP) – frappe/erpnextgithub.com
Where is the Official Website?
ERPNext: Free and Open Source Cloud ERP Software
ERPNext is the world’s top 100% open source ERP which supports manufacturing, distribution, retail, trading, services…erpnext.com
How can I quickly Install and Run on MacOS/Ubuntu/Windows
Here are Step by Step Instructions to Quickly run ERPNext with Docker Compose on Ubuntu, For Windows there will be separate article. For MacOS refer below article.
https://wordpress.com/post/technofunctionallearning.wordpress.com/8884
Step 01: Now first clone ERPNext docker repository by typing below command.
git clone https://github.com/frappe/frappe_docker.git

Step 02: In pwd.yml you will find all required images to run ERPNext, Kindly make sure to edit pwd.yml as per requirements given on below link or just copy paste from below link.
frappe_docker/docs/setup_for_linux_mac.md at main · frappe/frappe_docker
Docker images for production and development setups of the Frappe framework and ERPNext …github.com

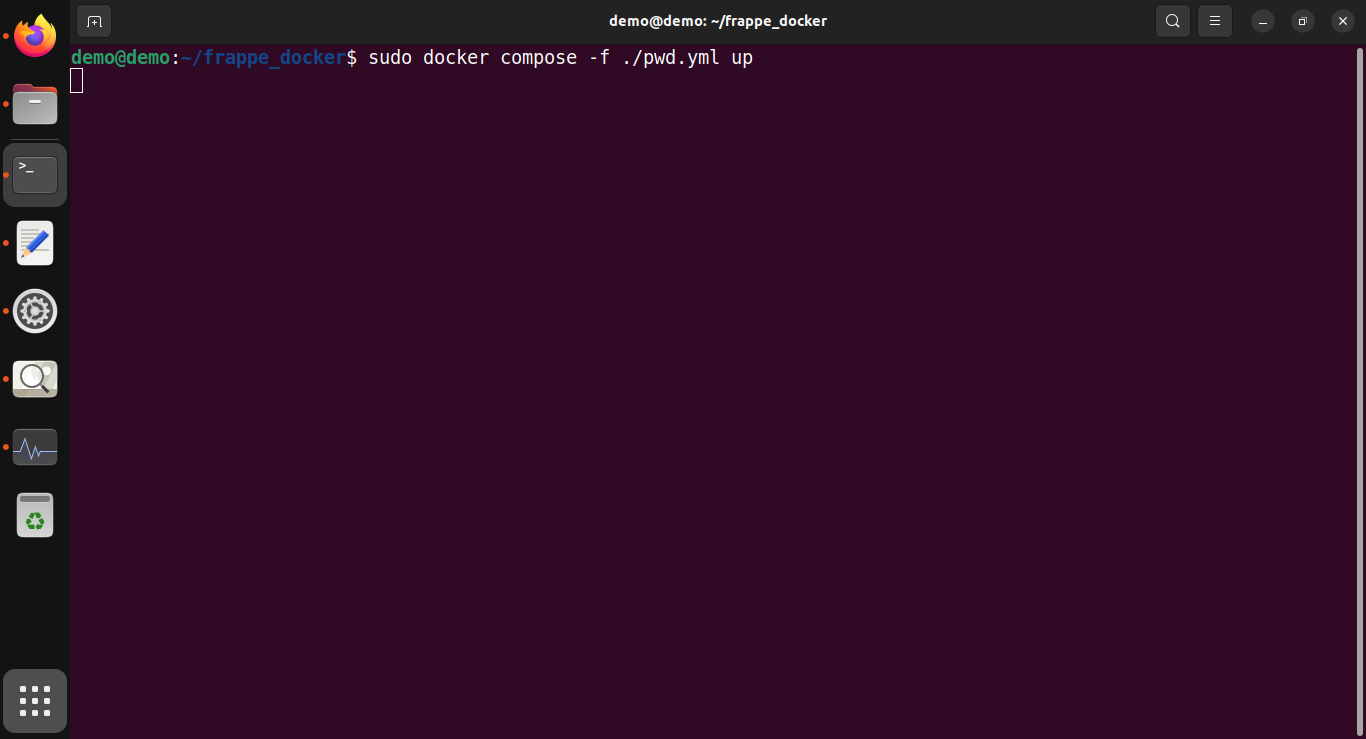
Step 03: Now type below command so that system can pull all required images and run ERPNext.
docker-compose -f ./pwd.yml up
Step 04: System will fetch all required images and ERPNext logon will be available at localhost:8080
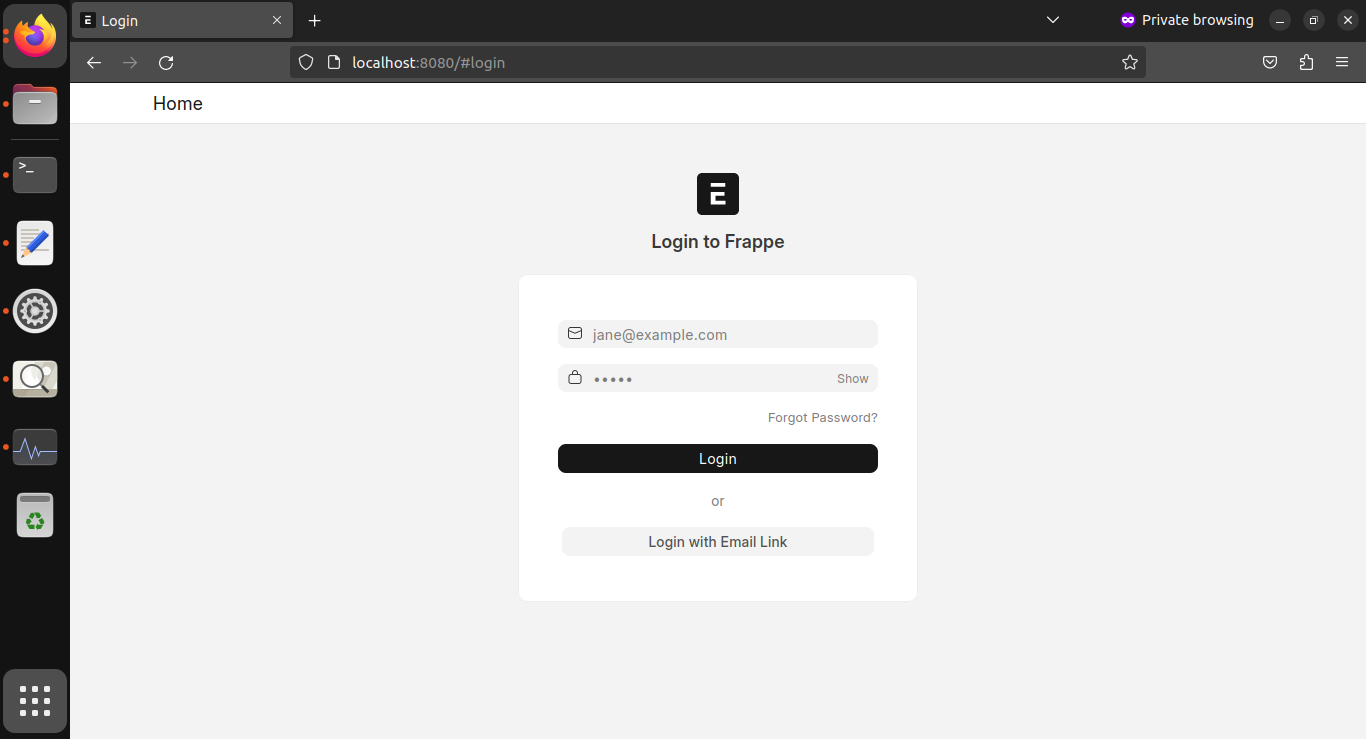
Step 05: Default login ID is Administrator and Password is admin, Details also available on Github

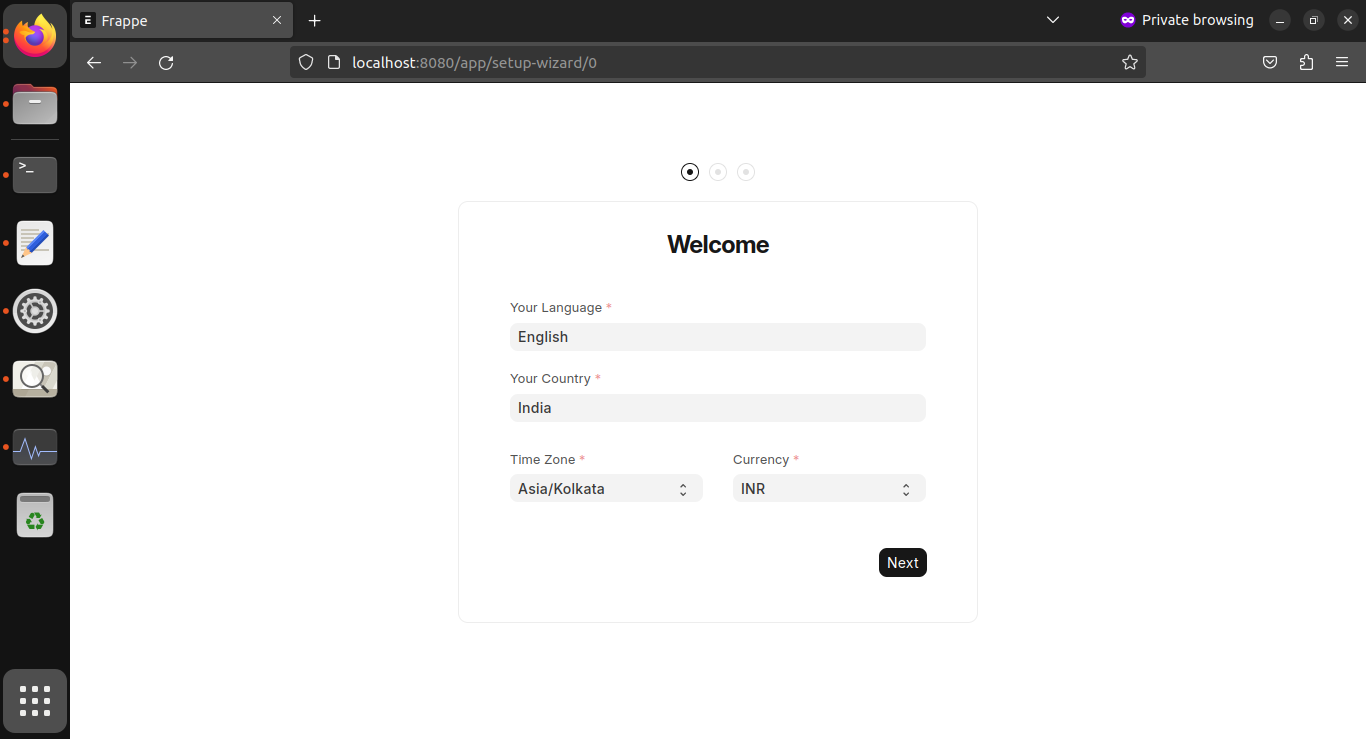
Step 06: Once you click on login in Above step, it will present you welcome screen, you can fill Preferred Language, Country, Time and Currency.
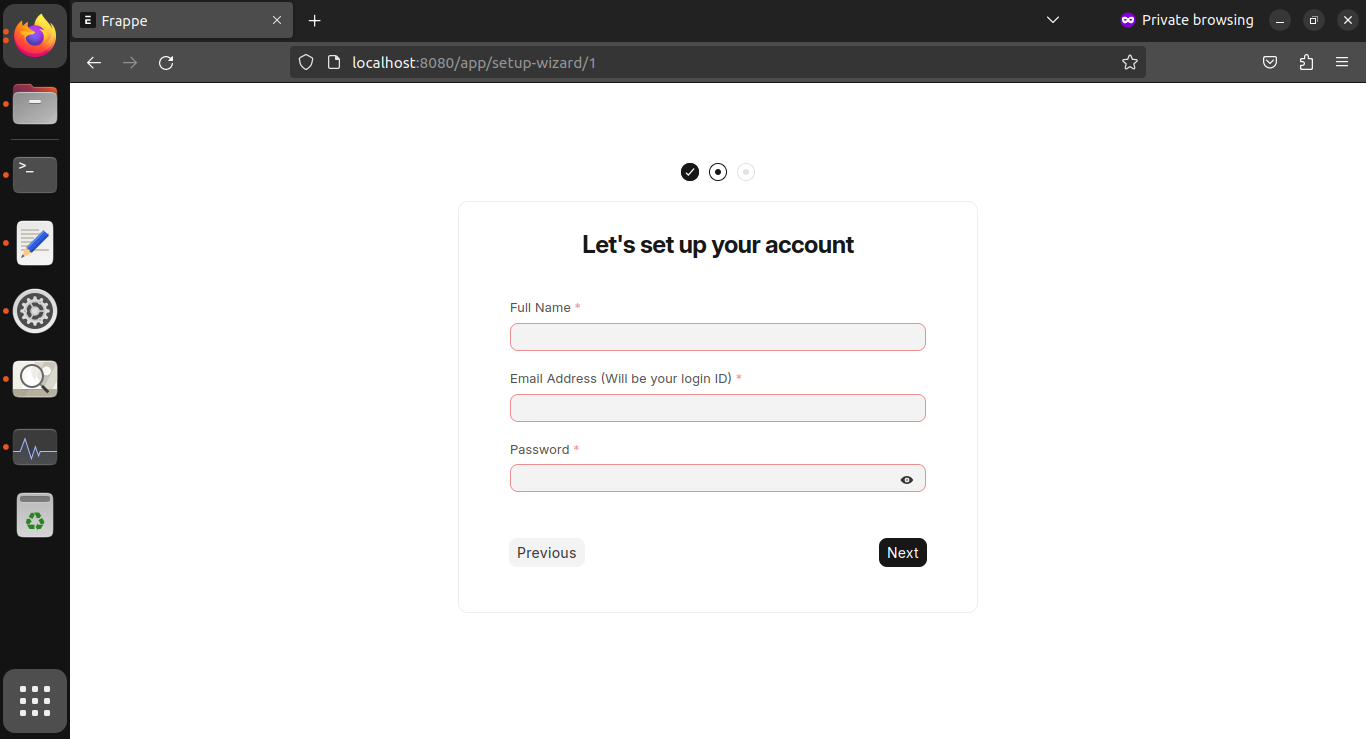
Step 07: Now Enter Your Name, email ID and password, Kindly note that once you will fill the detail and next time you login then email id is your login id and password which you will fill here is your password. You can also run ERPNext Completely offline without need for internet.
Step 08: Now setup your Company Details, Chart of Accounts Financial Year Beginning, if you want to generate demo data then click on icon and click on complete setup.

Step 09: After login, You will have guided tour function.

Step 10: The Various Modules which are available in ERPNext

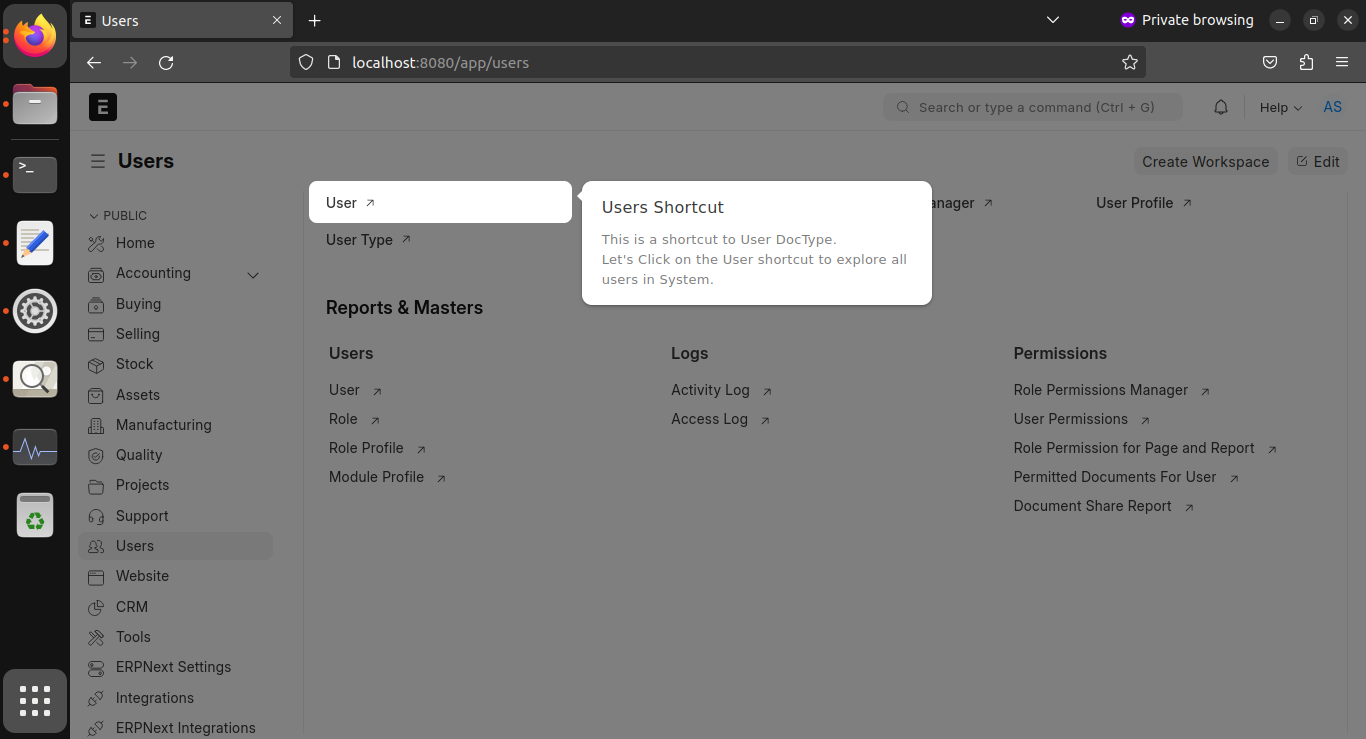
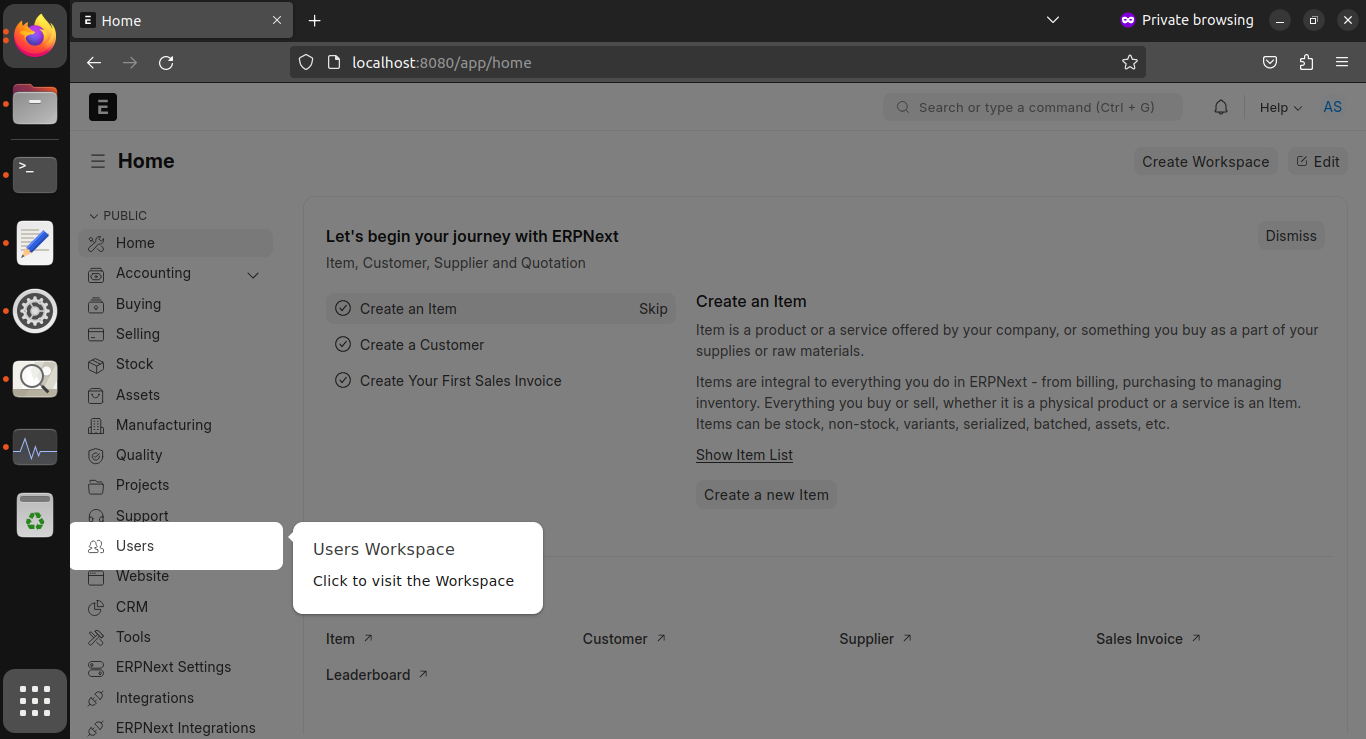
Step 11: Here you can do the user Management.
Step 12: Here are user shortcuts, admin, permissions etc, you can browse through other modules screenshots in MacOS Installation Article, you can find link above.